The Battle of Britain was the decisive air campaign in which RAF Fighter Command prevented the German Luftwaffe from gaining air superiority over southern Britain in the summer and autumn of 1940. The official British dates run from 10 July to 31 October 1940, although fighting began earlier and the bombing of Britain continued long afterwards. Its outcome kept Britain in the war and denied Germany the conditions it considered necessary for a cross-Channel invasion.
The battle was fought by pilots in Hurricanes and Spitfires, but its outcome depended equally on radar operators, observers, controllers, ground crews, aircraft factories and the organisation of Fighter Command. It demonstrated the value of an integrated air-defence system operating under intense pressure.
Britain after the fall of France
France’s defeat in June 1940 left Britain facing the possibility of invasion. Germany prepared Operation Sea Lion, but crossing the Channel against the Royal Navy while RAF fighters could attack the invasion force was an enormous risk. The Luftwaffe was tasked with overcoming British air resistance and, in particular, neutralising Fighter Command.
Air Chief Marshal Sir Hugh Dowding commanded Fighter Command from RAF Bentley Priory. His organisation divided Britain into geographical groups. Air Vice-Marshal Keith Park‘s No. 11 Group defended London and south-east England, the area most directly exposed to German aircraft operating from occupied Europe. No. 12 Group, commanded by Air Vice-Marshal Trafford Leigh-Mallory, defended the Midlands and was expected to help protect No. 11 Group’s airfields when required. Nos. 10 and 13 Groups covered western and northern Britain.
The Luftwaffe possessed considerable combat experience, but it faced demanding operating conditions. Single-engined Messerschmitt Bf 109 fighters had limited time over southern England before needing to return to bases across the Channel. German crews shot down over Britain were generally captured, whereas many surviving RAF pilots who landed on British territory could return to duty.
How the Dowding System worked
Britain’s defensive advantage lay in turning warning into timely interception. Chain Home radar stations detected approaching formations over the sea. The Royal Observer Corps tracked aircraft visually once they came inland and supplied information where radar coverage was limited. Reports were assessed and reconciled in the Filter Room at Bentley Priory before being passed through the command network.
Group and sector operations rooms used this information to direct fighter squadrons towards approaching raids. Controllers could scramble aircraft when needed, guide them to a useful height and position, and avoid keeping the entire force airborne on wasteful standing patrols. The system was imperfect, especially when raids were numerous, reports were delayed or communications failed, but it helped Fighter Command use limited resources economically.
Sector stations were therefore more than landing grounds. Their operations rooms, communications and supporting facilities were vital parts of the defensive network. Sustained attacks on these installations could have undermined the RAF’s ability to control its fighters even while serviceable aircraft remained available.
The Channel fighting, July 1940
The opening phase, often called the Kanalkampf, involved attacks on shipping and convoys in the English Channel. These operations drew RAF fighters into combat while the Luftwaffe tested British responses and sought to wear down its strength. Fighting was already taking place before the official starting date of 10 July.
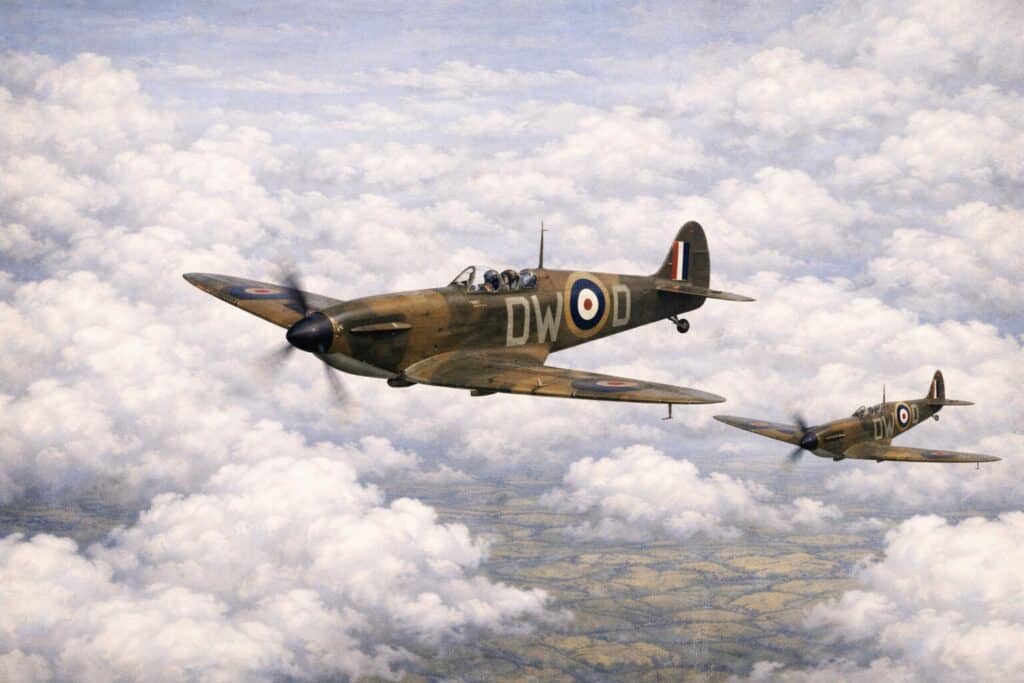
Hawker Hurricanes formed the greater part of Fighter Command’s single-seat fighter strength, with Supermarine Spitfires also playing a prominent role. Both types intercepted bombers and fought escorting fighters, although combat assignments varied according to circumstances. The RAF also used other types, including the Boulton Paul Defiant and Bristol Blenheim, whose limitations in daylight fighter combat became apparent.
The August offensive
In August the Luftwaffe increased attacks on RAF airfields, radar sites and other targets. Its major offensive, associated with the name Adlerangriff, was intended to weaken Fighter Command before any invasion attempt. The much-publicised Adlertag, or Eagle Day, on 13 August did not achieve the decisive blow German planners sought.
On 15 August, attacks extended across a broad front, including northern England, where German forces encountered stronger fighter opposition than expected. The day illustrated that Fighter Command’s defences extended well beyond the south-east. Heavy fighting continued on 18 August, sometimes called the Hardest Day, when both sides suffered substantial losses in attacks and interceptions.
Radar stations could be damaged, but the Luftwaffe did not systematically eliminate the warning network. Pressure on airfields and sector facilities in No. 11 Group was more dangerous. Biggin Hill, Kenley, Hornchurch and other stations faced repeated attacks, while aircraft, equipment and personnel were lost. Repair teams worked to restore runways, communications and operational facilities, and squadrons often continued fighting despite damage to their bases.
Pilots, squadrons and the battle of attrition
Fighter Command’s difficulties were not measured by aircraft alone. Experienced pilots were hard to replace quickly, and repeated scrambles left squadrons exhausted. Operational training units supplied replacements, but newly arrived pilots often had little combat experience. Squadrons were rested or transferred where possible, although the demands on No. 11 Group made relief difficult.
The defence was an international effort. British airmen fought alongside pilots from across the Commonwealth and other countries, including Poland, Czechoslovakia, New Zealand, Canada and many others. No. 303 (Polish) Squadron became particularly well known for its combat record, while Czechoslovak and other overseas personnel served across Fighter Command. Their contribution was part of the RAF’s operational strength, not a separate campaign.
The battle also depended on people who never flew a combat sortie. Ground crews refuelled, rearmed and repaired fighters at speed. Armourers, fitters, radio personnel, transport drivers, radar operators, plotters, controllers, observers and members of the Women’s Auxiliary Air Force sustained the system. Civilian workers and aircraft production and repair organisations helped replace damaged and destroyed machines.
Command decisions and the Big Wing dispute
Dowding and Park favoured committing squadrons in a controlled way, intercepting raids promptly and preserving fighters for subsequent attacks. Leigh-Mallory and Squadron Leader Douglas Bader were associated with the use of larger fighter formations, commonly called the Big Wing, intended to deliver greater striking power when assembled.
Larger formations could be effective when sufficient warning and time were available, but assembling them risked delaying interception. The disagreement concerned practical questions of timing, command and the defence of No. 11 Group, rather than a simple choice between courage and caution. Later controversy over tactics and leadership should not obscure the contribution made by squadrons across Fighter Command.
London, 7 September and Battle of Britain Day
On 7 September the Luftwaffe launched major attacks on London’s docks and surrounding districts. German strategy increasingly emphasised the capital, while attacks on airfields and military targets did not cease altogether. The shift reduced sustained pressure on some of the sector stations whose functioning was crucial to Fighter Command, giving the defence a measure of recovery time. It also brought devastating consequences for civilians and marked a major stage in the bombing campaign that developed into the Blitz.
On 15 September, Fighter Command intercepted major German daylight raids towards London. The engagements became an important symbol of British resistance and are commemorated as Battle of Britain Day. They did not bring all air fighting to an immediate end, but the Luftwaffe had failed to force a decisive collapse of Fighter Command.
On 17 September Hitler postponed Operation Sea Lion, although the invasion threat did not disappear immediately. By October, large escorted daylight bomber formations were less prominent, while German fighter-bombers continued attacks by day and night bombing intensified. The Blitz inflicted severe destruction and casualties through the following months. The official end of the Battle of Britain on 31 October is therefore a campaign boundary, not the date on which the danger to Britain disappeared.
Losses and the outcome
Aircraft-loss figures vary according to the dates used, services counted and treatment of damaged or written-off aircraft. A frequently cited RAF Fighter Command total is approximately 1,023 aircraft lost during the officially defined battle, 10 July to 31 October 1940. A post-war calculation based on German records gives 1,733 Luftwaffe aircraft lost and 643 damaged during the same period; other published accounts use different totals and definitions. These figures are not directly interchangeable. Fighter Command also lost 544 aircrew killed during the officially recognised battle, a reminder that aircraft replacement alone could not make good the human cost.
The RAF suffered serious losses in aircraft and aircrew, and Fighter Command was under particular strain during the late-August attacks on its sector network. Nevertheless, it remained an effective fighting force. The Luftwaffe could inflict damage but could not reliably suppress Britain’s air defence or secure the air superiority required for invasion.
Historical significance
The Battle of Britain was a defensive victory won through a combination of operational leadership, resilient infrastructure, industrial support and combat performance. The Spitfire and Hurricane became its most familiar symbols, but the underlying achievement was the ability to detect raids, organise interceptions, sustain squadrons and recover after repeated attacks.
Britain’s wider defence also involved Bomber Command attacks on invasion shipping, barges and ports on the occupied coast, although the central contest for air superiority was fought by Fighter Command. The campaign did not end German attacks on Britain, nor did it alone determine the eventual outcome of the Second World War. It did prevent Germany from achieving its immediate air objective in 1940. Britain remained an active Allied base, and the RAF’s survival helped make possible the longer war that followed.